01
Upload Your Floor Plan
Drop in any standard image file — JPG, PNG, or WebP — of your blueprint, sketch, or PDF export saved as an image. No special drafting software or file format required.
PNGJPGWebP
No design skills. No expensive software. No waiting days for a render studio. Just upload any 2D layout and let FloorVis AI handle the rest.
Drop in any standard image file — JPG, PNG, or WebP — of your blueprint, sketch, or PDF export saved as an image. No special drafting software or file format required.
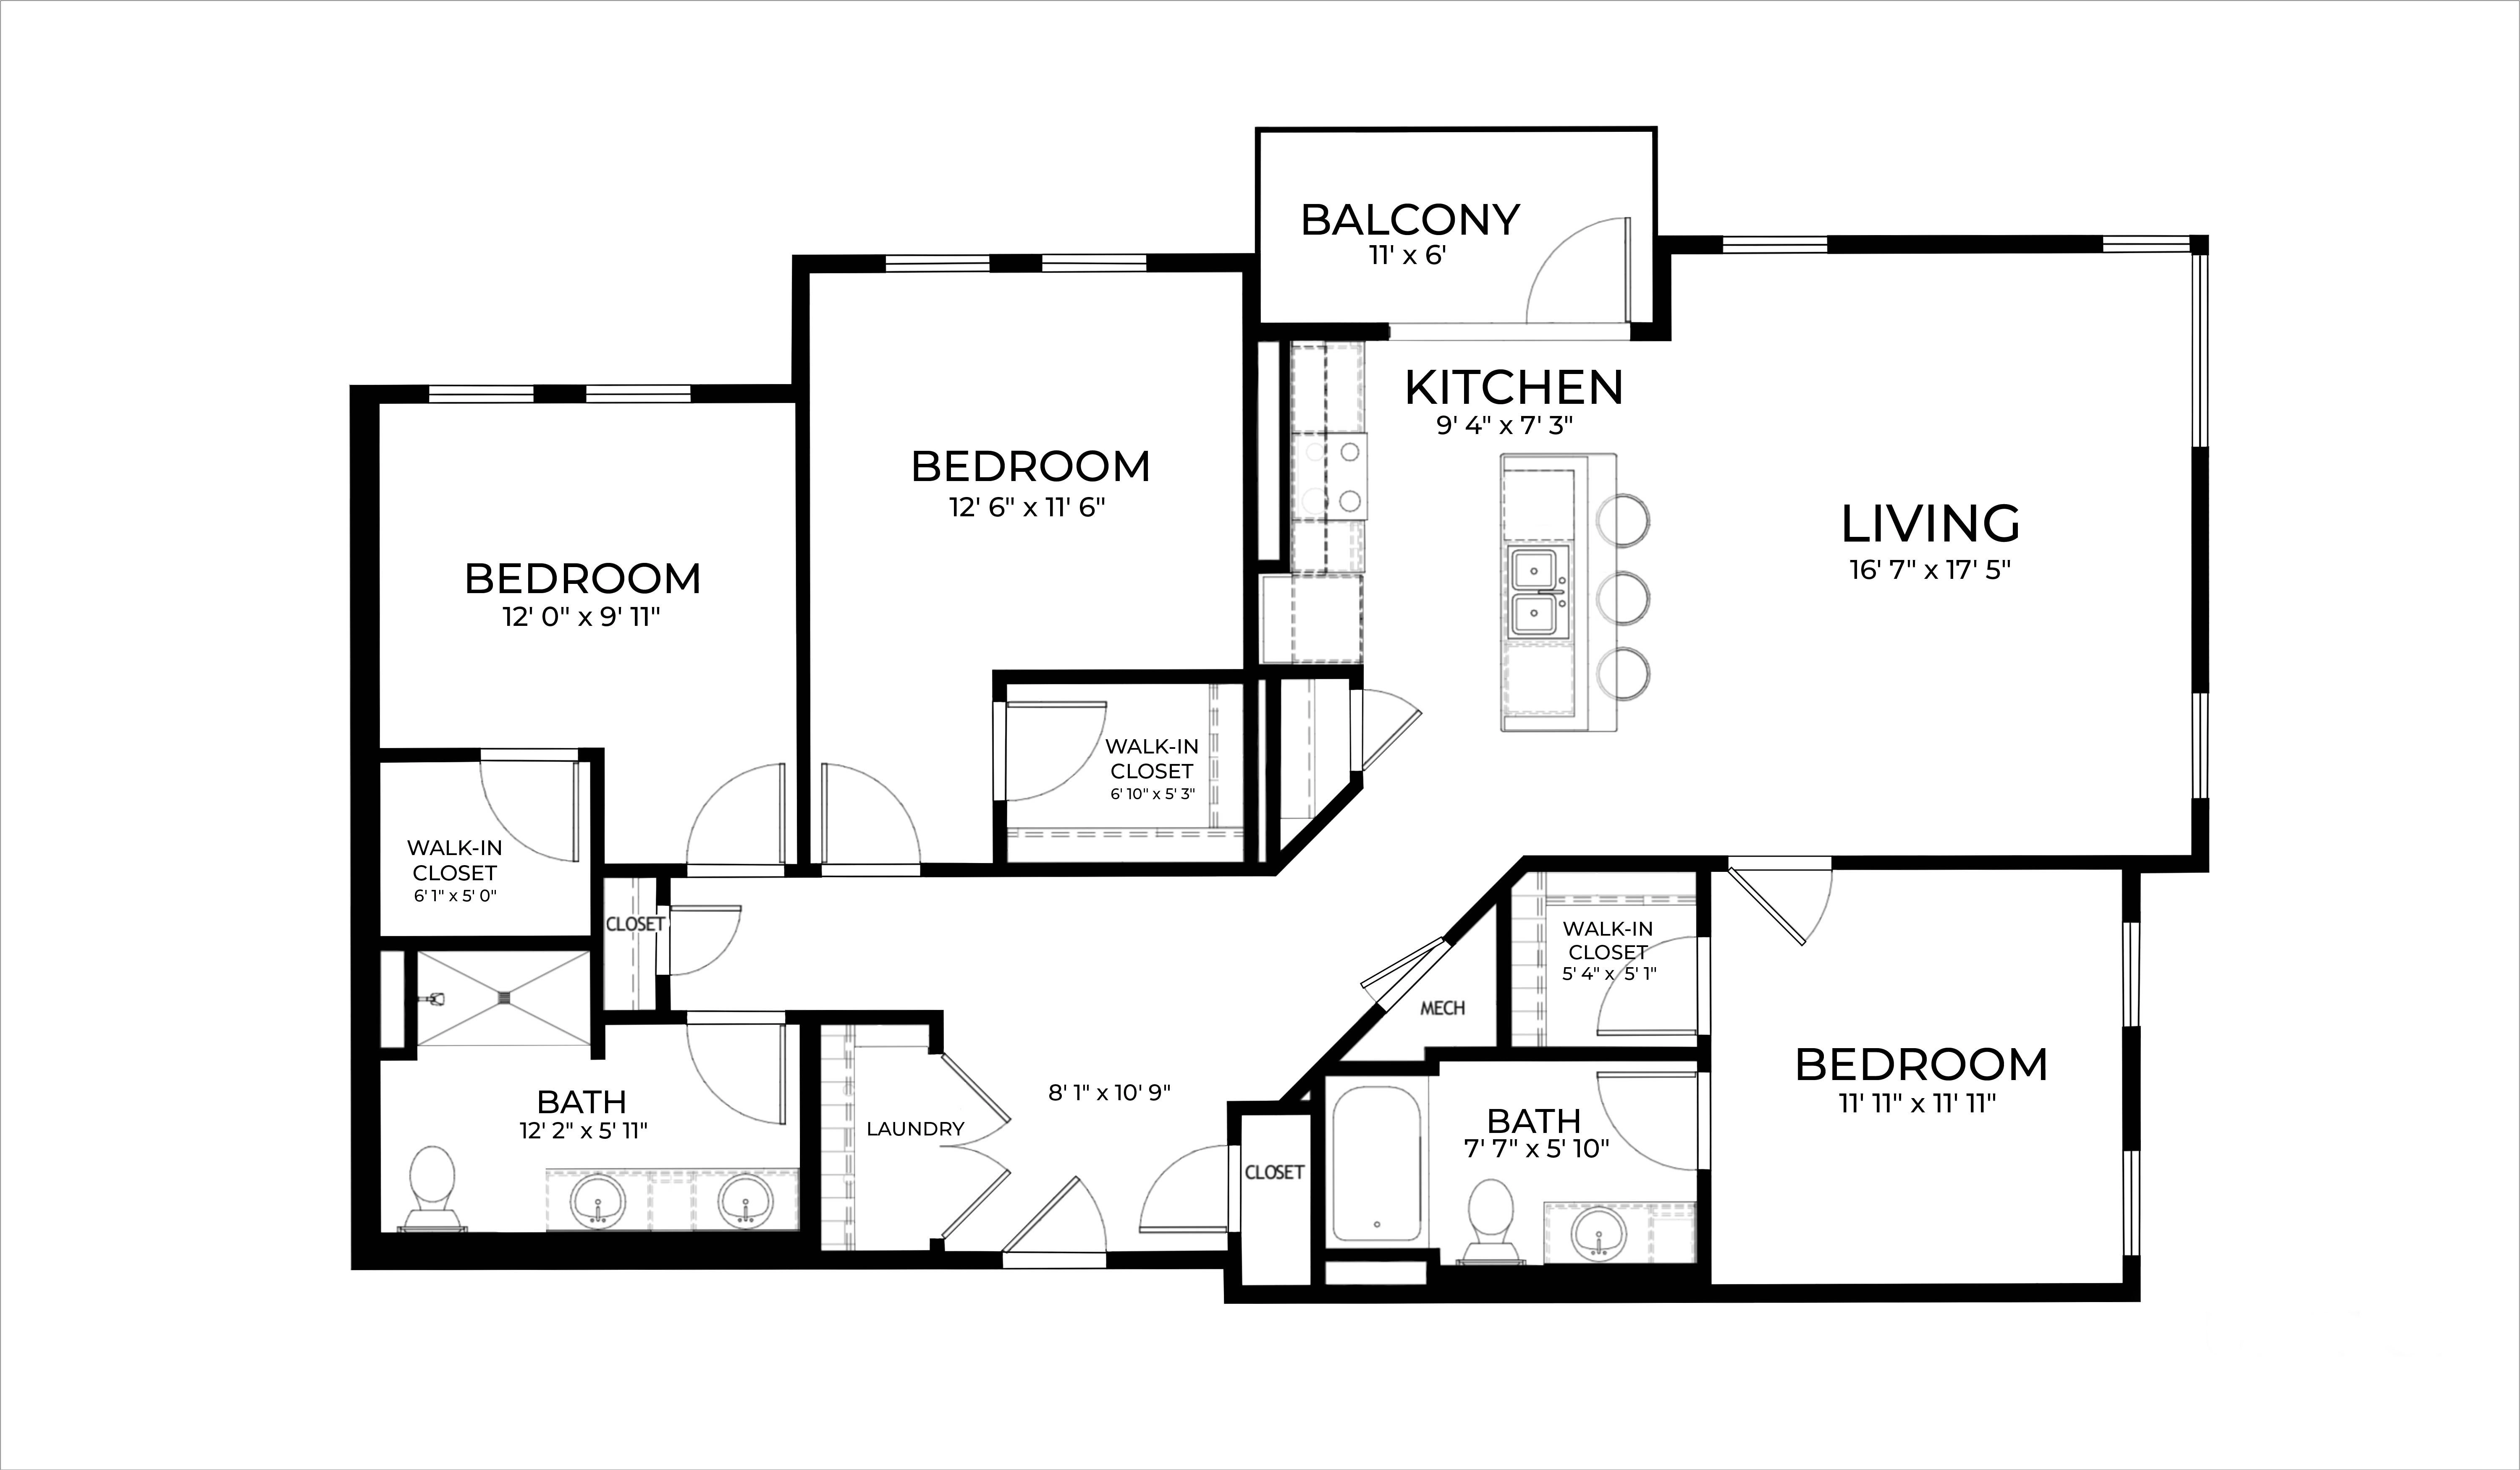
The AI reads your walls, doors, and windows, then transforms flat lines into a fully furnished 3D environment.
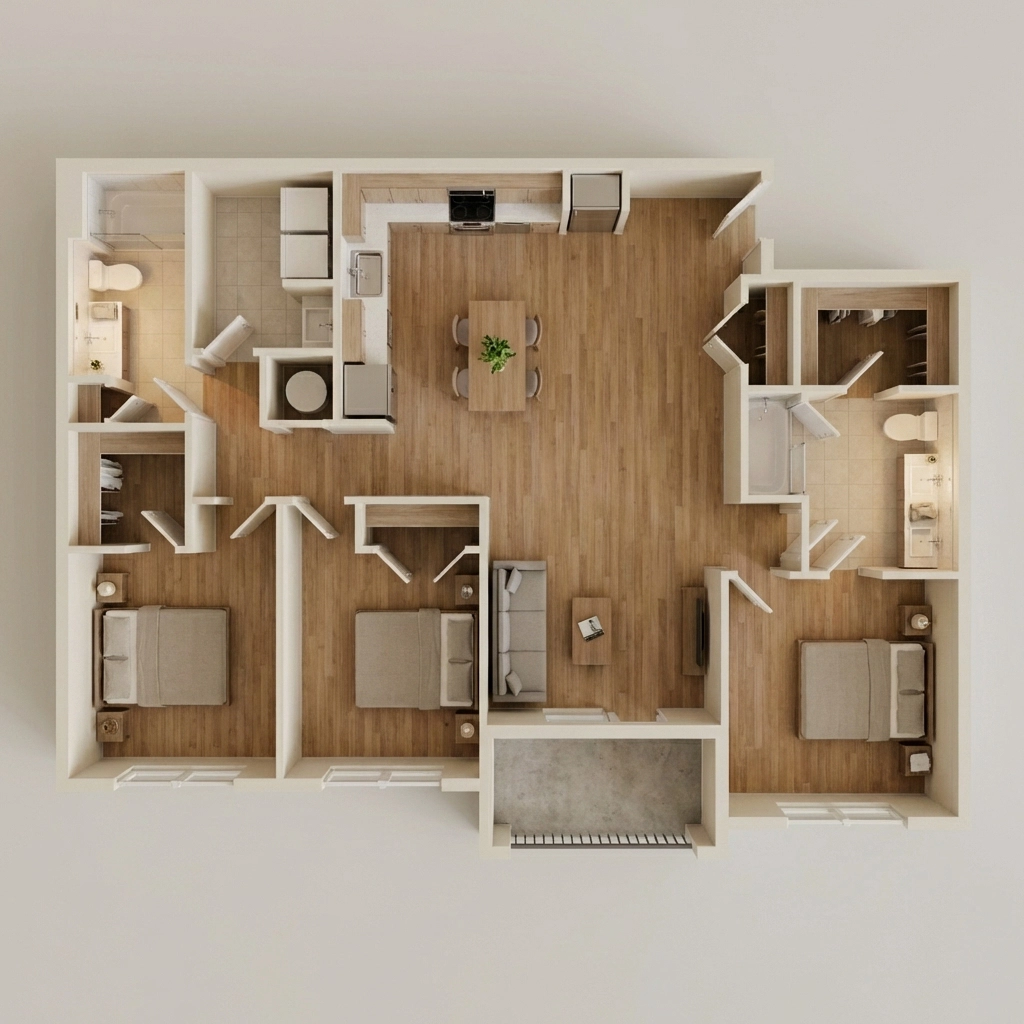
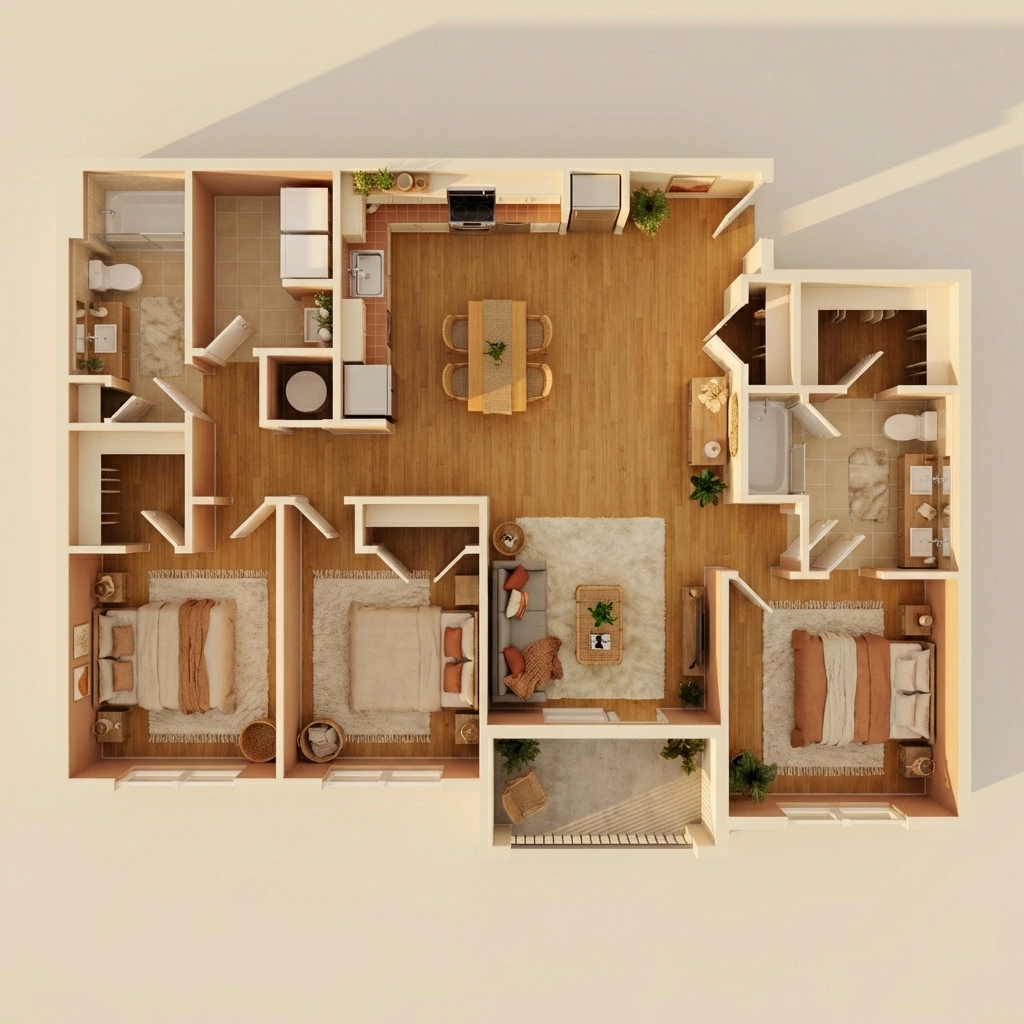
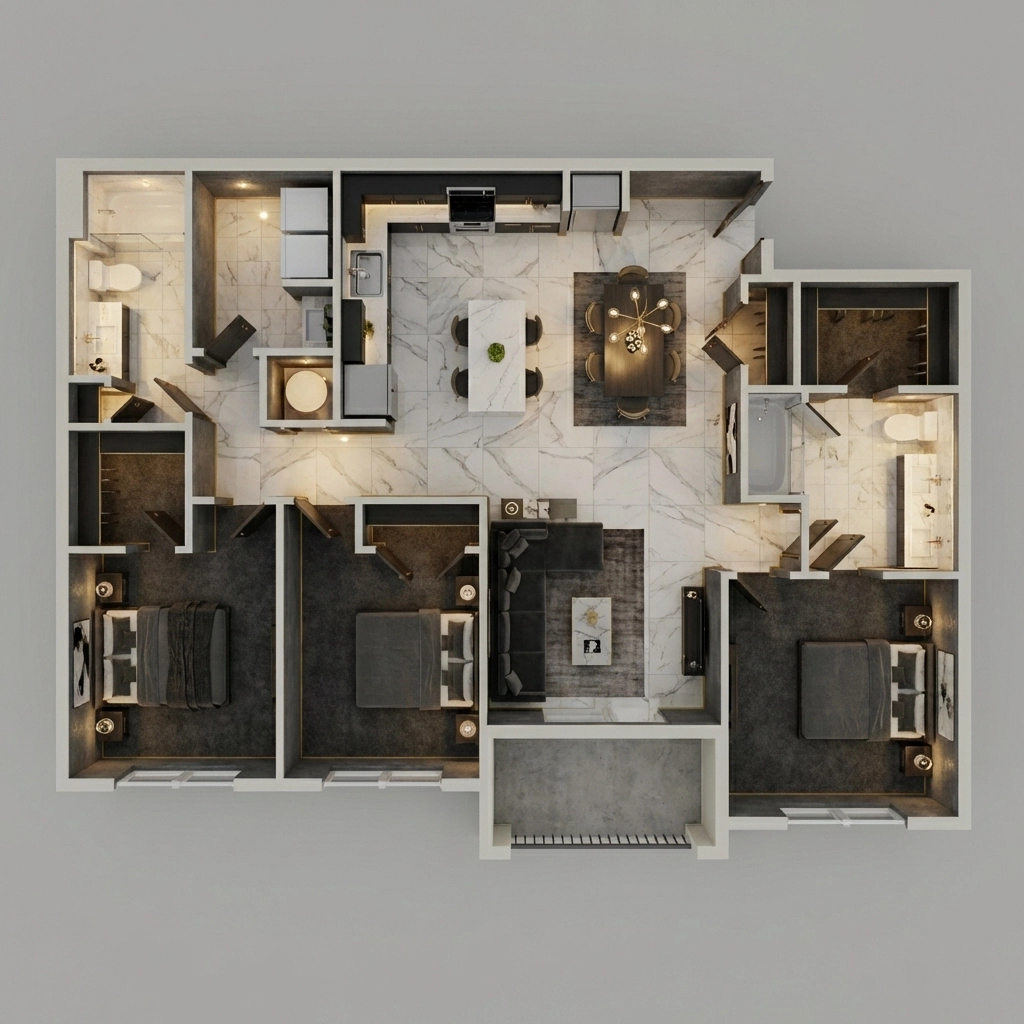
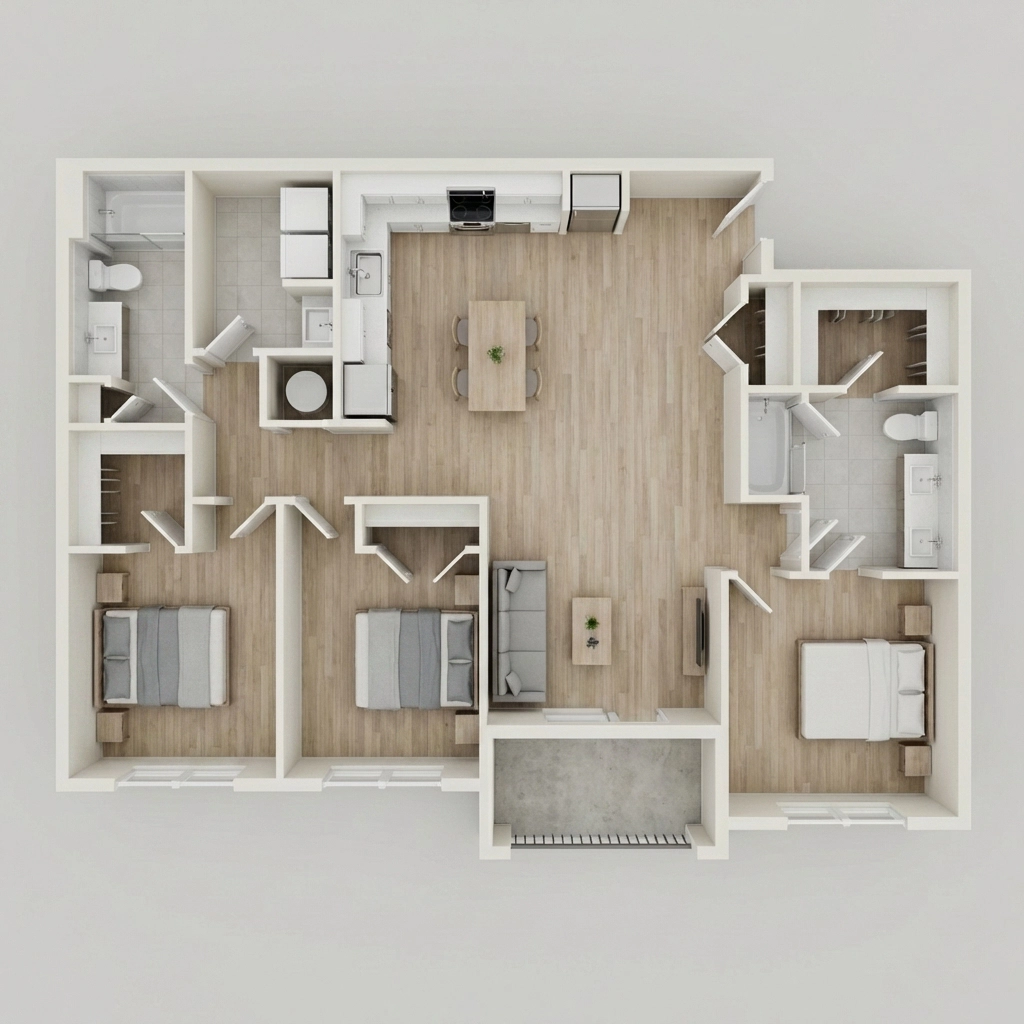
Export your photorealistic 3D visualization instantly. Use it in property listings, client presentations, marketing brochures, or social media. Every render is fully yours for commercial use.
FloorVis works with most 2D floor plan images. Follow these tips for the sharpest results.
The clearer the walls, doors, and windows in your plan, the more accurately FloorVis interprets the layout. Clean architectural exports work best.
Images at 1000 px or wider produce the sharpest results. Low-resolution phone photos still work, but detail may be limited.
When rooms are labeled (kitchen, bedroom, etc.), FloorVis can furnish each space more appropriately. Unlabeled plans still render correctly.
What the AI Reads
What You Get Back
This page explains the workflow, and these are the practical questions people usually ask before trying an AI floor plan to 3D tool for the first time.
FloorVis accepts PNG, JPG, and WebP floor plan images. Clean architectural exports and blueprint scans usually produce the best AI-generated 3D results.
Most renders complete in under 10 seconds, though timing can vary slightly based on layout complexity and current processing load.
FloorVis does not currently offer a public self-serve API. If you need bulk processing or a custom workflow, contact the team to discuss your use case.
Yes. You can use your FloorVis renders in property listings, client presentations, marketing materials, and other commercial deliverables.
Try FloorVis
Create an account, choose a credit pack or plan, and see how quickly FloorVis can turn a static layout into a polished visual for sales, design, and presentation work.
